Day 5: KVM and LibVirt for Linux Virtualization
{{ printf “Estimated reading time: %d minutes” .ReadingTime }}
Hey! Welcome back! Day 5 builds upon the previous days and presumes you have some homelab hardware installed with linux and have followed the virtualbox virtualization tutorial on day 3.
KVM
KVM stands for Kernel based virtual machine. It’s Linux virtualization technology used by almost all cloud providers. This technology allows you to abstract the physical resources such as cpu, gpu, RAM, disk into isolated flexible and scalable virtual environments. KVM uses virtualization extension found in your CPU, namely intel VT amd V for speed..
This is akin to 10 A4 pages and will take
Understanding hypervisors
A hypervisor is a virtual machine monitor which manages virtual machines. Effectively splicing up your physical desktop, server or laptop or resources into parts. Each Virtual machine has it’s own CPU, RAM disk and networking. MOdern x86 AMD/INTEL processors have specific CPU instructions for virtualization.
THere’s type 1 and type 2 hypervisors.
The market is full of hypervisors including vmware, kvm, xen, hyper-v. Most virtualization tools use one of these.
Why KVM? Big Cloud Providers use it
KVM
KVM is the backbone of cloud infrastructure in the public internet I’d estimate it to be way above 70% of total virtualization market share, GCP and AWS together are 42% of market share.
There are at least 12.788 large companies (1000+ employees) which publicly acknowledge they use KVM. 1 Amazon AWS datacenter and cloud used to use XEN as a hypervisor but began migrating to KVM 2 GCP (Google CLoud PLatform) uses Compute Engine which is a security hardened KVM based hypervisor (kernel based virtual machine) 3 Since all cloud providers use KVM underneath their tech stack, YOU gain a great advantage by leveraging KVM on your systems
Everything OPenSource is packaged as a product for the uninitiated to consume
I’m also going to talk about various alternatives which you can use instead of going on the route of a specific CLoud Provider. Most big cloud provieders provide the same software apps, with various API’s which lock you in.
The top 3 cloud providers AWS (Amazon) 28%, GCP (GOogle) 14% and Azure (Microsoft) 21% are followed by hundreds of “smaller” cloud providers such as Alibaba (4%), Oracle (3%) and even smaller ones like Linode, DigitalOcean, Vultr. It’s important to understand that ALL cloud providers use open source technology repackaged to sell you the services which you can achieve on your own! Understanding the pitfalls of vendor lock-in will help you tremendously. As if you’d go on the VPS or Baremetal route you can cut your cloud costs by 500%.
This guide presumes your hardware already has virtualization enabled in BIOS
What is libvirt qemu and how are they connected to KVM?
QEMU
QEMU stands for Quick EMulator and is an emulator and virtualizer meaning it can work directly with KVM. However it also does emulation by JIT (just in time) binary translation which means you can also emulate different CPU instruction sets such as ARM, powerPC,risc-v. Making it invaluable when developing software if you don’t have hardware available or want to make development much faster.
LibVirt
Libvirt is a cross platform (MEANING YOU CAN USE IT ON Linux, freebsd, WIndows, MaCOS) toolkit which helps you manage virtualizaton platforms. is accessible from the command line but also hbas bindings in different programming languages such as C, Python, Perl, Go and more It supports plenty of hypervisors including KVM, Hypervisor.framework, QEMU, Xen, Virtuozzo, VMware ESX, LXC, BHyve and more
The most important part is that it’s used by many applications and cloud providers under the hood..
Installing KVM and LibVirt
Install libvirt, qemu, kvm, some networking tools, guestfilesystem tools, virtual viewer and the GUI virt-manager for easier beginner management;)
In older versions you might install qemu-kvm which now selects qemu-system-x86 automatically.
Add your user to the correct groups
Depending on Linux distro and/or recent version, it’s best to add them all:
Apply group changes
Verify if your system is ready for virtualization
Libvirt daemon should start automatically. In case it’s not start and enable libvirt daemon
sudo systemctl enable --now libvirtd
virt-host-validate
This will tell you if hardware virtualization is on
Normally you should enable the specific virtualization for your CPU via BIOS, check if it’s supported.
LXC failures don’t really concern us right now. LXC was a precursor to docker which made the whole containerization possible.
However, yes, you can use libvirt for containers aswell
Providing CGROUPS to VM Guest
To fix the warnings in QEMU you need to edit some grub settings such as iommu=pt intel_iommu
https://discussion.fedoraproject.org/t/how-to-enable-devices-and-freezer-in-kconfig-file/118077/2
This really depends how deep you want to test virtualization and if you’re planning to squeeze most:)
INstalling a Virtual Machine
The first step to installing a VM is to manually download a ISO and manually go through the installation process.
While this is OK in many cases especially if you want to ensure you install and configure your desired operating system it will become bothering and boring after the 10th install. So we will atuomate this process.
There’s tools like debootstrap to automate a installation of a debian into a folder, which we can convert to a VM. The added benefit of using debootstrap is that YOU can automate AND get which packages go into your VM making sure you minimize security incidents by not relying on 3rd party “images”
THere’s also a better way, there are official cloud images of most Linux distributions including Debian which can be used on
- OpenStack providers
- Local QEMU vm’s
- Amazon EC2
- Microsoft Azure
Local QEMU is what we’re after, we have 2 different files we can use https://cloud.debian.org/images/cloud/trixie/latest/debian-13-nocloud-amd64.qcow2 https://cloud.debian.org/images/cloud/trixie/latest/debian-13-nocloud-amd64.raw
.RAW vs .qcow2 copy on write
NOTE: Use .raw files if you have a filesystem with copy on write enabled such as ZFS, btrfs etc. Use qcow2 if you’re using ext4 or anything else. You CAN use qcow2 on ZFS but you’ll have double copy on write allocations for every modified data block. Meaning will probably be slower, I haven’t benchmarked in production so we’re going on the safe side.
Since I manually installed ZFS on my Debian 13 Trixie pre installation I’m going to use raw, use qcow2 if you have ext4 since it’s 300MB vs 3GB for the .raw one.
Homework for ZFS using zvols
if you’re running zfs you may want to download a qcow2 and convert it to a zvol ;). This maps the VM image to a ZFS zvol. It’s similar to how overlayfs works for docker containers.
qemu-img convert -O raw <infile.(vdi|vmdk|$whatever)> /dev/zvol/rpool/data/<vmid>-disk0
INstallatin process
I’m now going to show you the manual process of installing virtual machines which I still use when experimenting.
Open Virtual Machine manager on your Linux machine
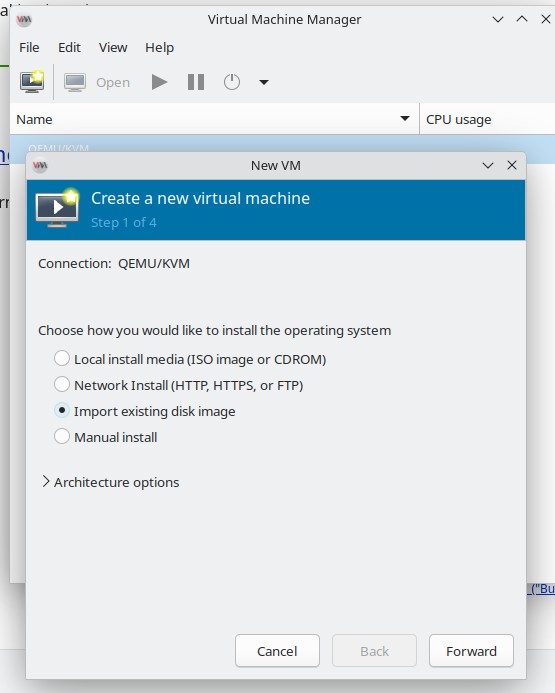
Add path
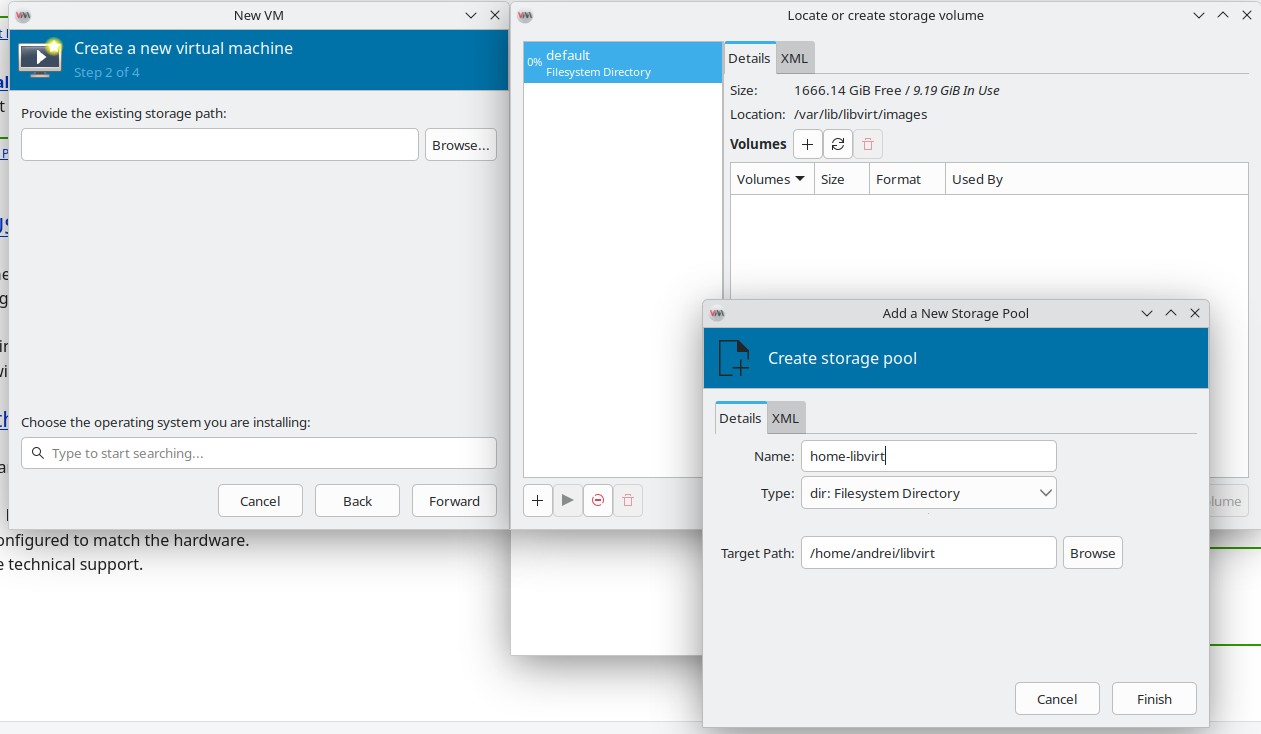
Select the debian linux IMG
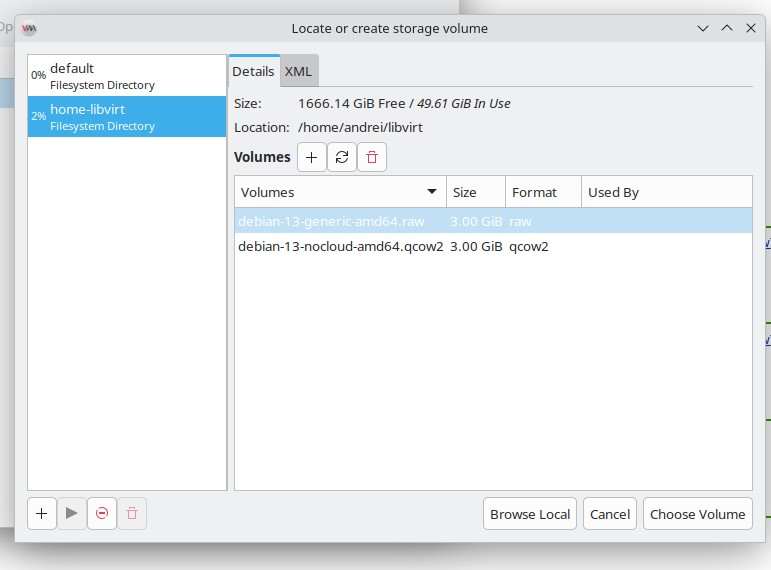
You can also choose “browse local”. Select Debian13 as Operating System. 2048 GB 2 CPU is OK, we can change that later
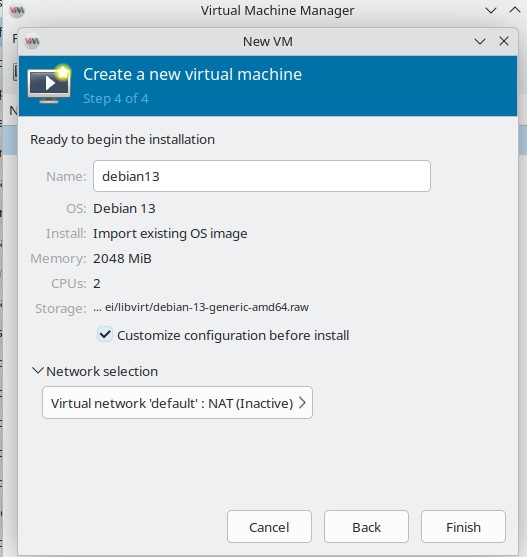
Start the VM
NOTE: Make sure you make a copy of the RAW/QCOW2 fileas that’s the disk the virtual machine will use:) and it will start writing it. .qcow2 or using zfs volumes is super helpful here as you can just copy/paste the volumes around and ensure you can snapshot disks around.
You should be greeted with login interface
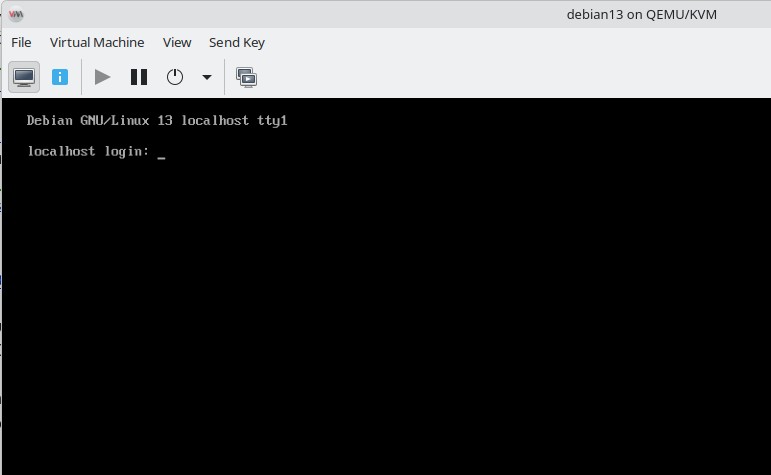
Usually the username root with a blank password should work.
setting a root password and customizing some details
Sometimes this won’t work… so we go the route of setting up a password. There are multiple manual ways to do this via grub editing . However, as a DevOps you will want to use commands to automate your workflow.
Shut down your VM before attempting this. DO it via virt-manager or with virsh shutdown debian13 (or whatever name you gave it!)
THe following command will set the root password, hostname and will run ssh-keygen and start sshd;)
Reboot the VM, you should see the VM devopsmagic name changed and you can login with the password for root;).
COmmand Line Usage
First set the libvirt default uri to the system one (root). You can also use the local user’s libvirt session qemu:///session
Accessing QEMU KVM instances via SSH from other machines
Notice the format, as you deepen your DevOps and linux
knowledge, use something akin to qemu://192.168.135.27/session to access the KVM qemu sessions from different hosts.
Accessing remote systems from the internet and making your own cloud SSH as qemu+ssh://username@hostname/system.
Setting default libvirt URI:
Because you’re a devops, you will want to use the command line to manage virtual machines or use scripts for this process. A bash script in a git or fossil repository is a first step to establishing infrastructure sa code
The –noauthconsole ensures you won’t get the console slpash which allows you to login to it directly without the need to use SSH.
Opening a windowed viewer for the machine
An auto VNC system to login to your machine which is super useful if you have a GUI.
Opening a console in your terminal
SSH-ing into the console is the best, however virsh allows you to get access to a console within the virtual machine automatically. Meaning you can copy paste commands seamlessly from your system.
cloud init configuration and virtual machine install automation
Oftentimes you will use cloud init for configuration of cloud images. Meaning you can specify a lot of automation steps. If this looks similar to how ansilble or terraform works, it’s basically almost the same thing. All cloud providers use this when you purchase a VPS or a service to setup your virtual machine;)
The following create a username called andrei define the default shell, copy over the ssh authorized keys so I can ssh into the VM
without password AND will grant me sudo without asking ffor password.
The sudo part is useful for local deveopment, maybe disable it for
The command to make a KVM libvirt machine.
The previous if run in Linux will automatically open the console ;) into the machine.
Internet issues in VM?
IF running the cloudinit version internet should WORK properly, when running the non cloud init version networking MAY fail to work.
Please note that there is an issue on debian 13 resulting in broken network connections when running virt-customize which we wil do later. If you run into this issue, also install these packages
sudo apt install \ systemd-resolved \ dhcpcd-base
NOTE
On some systems this might make the internet and DNS networking fail so maybe install these ONLY if the rest of the walkghrough options don’t work for you
Run this on host
Check ip forwarding
cat /proc/sys/net/ipv4/ip_forward
If it returns 0, enable it:
sudo sysctl -w net.ipv4.ip_forward=1
If all else fails… reboot your HOST machine. I know, Linux and *BSD systems don’t need reboots like Windows, however sometimes when all else fails this can be tried.
Explore LibVirt Extra Might and Magic
You can use libvirt, virt-manager, virsh etc to connect to multiple machines running KVM/Linux THis enables failover, high availability and a plethora of other nice features like live migration of
Explore these on your own.
COnclusion
RUnning KVM locally on a Linux machine is the first and best step to get started with Virtualization for real.
You can build and sell your own cloud VPS
If you build a simple UI web interface you can now easily deploy VM’s for people and ask for money, effectively creating your own cloud infrastructure, it’s this easy. There are some extra steps but the process is pretty simple one you get the hang of it
TODO VIDEO
TODO still have to explain how to set it up ;) and make a video about it:) but this is for later
What’s next?
We’ll automate things even more with terraform for libvirt and other automations. The next days we’ll see why engineering is non linear and why it’s a good thing and we’ll start by setting up our own Linux Virtual private server with a cloud provider.
COmpanies using KVM https://theirstack.com/en/technology/kvm ↩︎
AWS migrating to KVM https://medium.com/@dbclin/aws-just-announced-a-move-from-xen-towards-kvm-so-what-is-kvm-2091f123991 ↩︎
GCP using KVM https://docs.cloud.google.com/compute/docs/instances/nested-virtualization/overview ↩︎